
The Battle of Dunbar was the only significant field action of the campaign of 1296 during the beginning of the First War of Scottish Independence.
Background
The background to the battle is given in more detail on the previous article on the Balliols.
King Edward I of England had invaded Scotland in March 1296 to punish King John Balliol for his refusal to support English military action in France. After the sack of Berwick-upon-Tweed, Edward rushed to complete the conquest of Scotland, remained in the town for a month, supervising the strengthening of its defences. On 5 April, he received a message from King John renouncing his homage, to which he remarked, “O’ foolish knave! What folly he commits. If he will not come to us we will go to him.”

The next objective in the campaign was the Earl of Dunbar & March‘s castle at Dunbar, a few miles up the coast from Berwick. The Earl of Dunbar was with the English, but his wife, Marjory Comyn, sister of the Earl of Buchan, did not share her husband’s political loyalties and allowed her fellow Scots to occupy the castle. Edward sent one of his chief lieutenants, John de Warenne, 6th Earl of Surrey, John Balliol’s own father-in-law, northwards with a strong force of knights to invest the stronghold. The defenders sent messages to King John, who bivouacked with the main body of his army at nearby Haddington, asking for urgent assistance. In response the army, or a large part of it, advanced to the rescue of Dunbar. John Balliol, who was showing even less skill as a commander than he had as a king, did not accompany it. The campaign of 1296 was now to enter its final phase.
The First Battle of Dunbar, 27 April 1296

According to Sinclair, Robert (2013). The Sinclairs of Scotland. Bloomington: AuthorHouse. pp. 41–42. ISBN 9781481796231:
“There is little evidence to suggest that Dunbar was anything other than an action between two bodies of mounted men-at-arms (armoured cavalry). Surrey’s force seems to have comprised one formation (out of four) of the English cavalry; the Scots force led in part by Comyns probably represented the greater part of their cavalry element.
The two forces came in sight of each other on 27 April. The Scots occupied a strong position on some high ground to the west. To meet them, Surrey’s cavalry had to cross a gully intersected by the Spott Burn. As they did so their ranks broke up, and the Scots, deluded into thinking the English were leaving the field, abandoned their position in a disorderly downhill charge, only to find that Surrey’s forces had reformed on Spottsmuir and were advancing in perfect order. The English routed the disorganised Scots in a single charge.
The action was brief and probably not very bloody, since the only casualty of any note was a minor Lothian knight, Sir Patrick Graham, though about 100 Scottish lords, knights and men-at-arms were taken prisoner. According to one English source over ten thousand Scots died at the battle of Dunbar, however this is probably a confusion with the casualties incurred at the storming of Berwick.
The survivors fled westwards to the safety of the Ettrick Forest. The following day King Edward appeared in person and Dunbar castle surrendered. Some important prisoners were taken: John Comyn, Earl of Buchan, and the earls of Atholl, Ross and Menteith, together with 130 knights and esquires. All were sent into captivity in England.”
Battlefields of Britain Report on the First Battle of Dunbar
The text below is largely from the Battlefields of Britain site which, sadly, is now longer online.
Following impossible demands for military service from Edward I, King John Balliol forged what would become known as the ‘Auld Alliance’ with France prompting the First War of Scottish Independence. At the Battle of Dunbar (1296) the English achieved a decisive victory that saw the overthrow of the Balliol regime.

Historical Background
Following the deaths of Alexander III and his only heir, Margaret, Edward I of England was asked to arbitrate between rival claimants for the Scottish throne. At Berwick Castle, on 17 November 1292, the English King announced his verdict in favour of John Balliol whom it was anticipated would be a reliable vassal. However, Edward’s excessive demands for men and money to support a war with France placed the new Scottish King in an impossible position. He was left little choice but to rebel and sought to agree a mutual defence pact with France. Outraged Edward raised an army to deal with the threat and by March 1296 the two countries were at war; the Scots launched a failed attack on Carlisle Castle on 26 March but this was followed by a brutal English assault on Berwick on 30 March. The sacking of the latter, Scotland’s largest port and a thriving mercantile community, was designed to awe King John into submission. After one month militarising Berwick, Edward commenced preparations for penetration into southern Scotland. A key installation along the coastal road was Dunbar Castle which although owned by Patrick, Earl of March – who supported Edward I – had been handed over by the Earl’s wife, Marjory Comyn, to the forces of King John.
Prelude
On 23 April 1296, as a precursor to advancing on to Edinburgh, Edward sent John de Warenne, Earl of Surrey north to secure Dunbar Castle. Fully aware the defences were inadequate to repel such a significant force, the garrison sent a plea for help to King John who was camped at Haddington, some 10 miles to the west. As Surrey arrived at Dunbar, immediately beginning siege-works against the castle, King John dispatched a force to fight the English. Under the command of John Comyn, Lord of Badenoch (Red Comyn), the mounted elements of the Scottish army advanced on the English position.
Numbers
The English army was led by John de Warenne, 6th Earl of Surrey – John Balliol’s own father-in-law and a competent military commander with previous experience fighting in Wales. It is likely that Surrey’s force consisted of almost entirely mounted men.
King John had not accompanied his army to Dunbar and instead placed John Comyn, Lord of Badenoch (The Red Comyn) in charge. However, the Scottish forces also included numerous other high status magnates including John de Strathbogie (Earl of Atholl), Alexander (Earl of Menteith) and William (Earl of Ross) all of which undoubtedly confused the chain of command.
The Battle
The Scottish forces arrived on the morning of 27 April and formed up on Spottismuir – a ridge of high ground overlooking Dunbar.
– Stage 1: English Advance
Undeterred by the formidable Scottish defensive position, Surrey left his infantry to maintain the siege of Dunbar Castle but moved his mounted forces to engage the Scots.
– Stage 2: Crossing the Spot Burn
In order to assault the Scottish position, the English had to cross the Spott Burn. This seemingly disrupted their lines for Comyn, with his forces now on the slopes of Doon Hill, misinterpreted the manoeuvre as one of retreat. Hoping to capitalise on the disruption to the English lines, he ordered the Scots to charge.
– Stage 3: Scottish Attack
The Scottish charge consisted of a disorganised descent down the hill. By contrast the English, having now forded the Spott Burn, reformed and counter charged routing the Scots. Whilst fatalities seem to have been limited – records suggest only one Scottish Knight, Sir Patrick Graham, was killed – significant numbers of Scotland’s best warriors were captured including John Comyn, John de Strathbogie (Earl of Atholl), Alexander (Earl of Menteith), William (Earl of Ross) and perhaps as many as 100 Knights. A handful successfully escaped into the Ettrick forest.
Aftermath
The battle was a disaster for the Scots and saw over 100 high status prisoners taken. With the arrival of Edward I and the main English army on 28 April 1296, Dunbar Castle surrendered to the English. In the weeks that followed most of central and southern Scotland came under Edward’s control with key castles – most notably Roxburgh and Stirling – being handed over without a fight. On 21 June 1296, perhaps influenced by the fate of Llywelyn ap Gruffudd in the earlier Wars of Welsh Independence, King John capitulated to Edward I. On 8 July, at Montrose, he was stripped of his Royal regalia and forced to abdicate with Edward I choosing to keep the Scottish throne vacant. The Wars of Scottish Independence had seemingly ended but, just 10 months later, William Wallace would kill William de Heselrig, High Sheriff of Lanark and start an uprising that would later see Surrey humiliated at the Battle of Stirling Bridge (1297).
Bibliography
Armstrong, P (2003). Stirling Bridge and Falkirk 1297-98: William Wallace’s rebellion. Osprey, Oxford.
Black, C. S (1936). Scottish Battles. Brown and Ferguson, Glasgow.
Burns, W (1874). The Scottish War of Independence Its Antecedents and Effects. James Maclehose, Glasgow. Cauldwell, D.H (1998). Scotland’s Wars and Warriors: Winning against the Odds. Historic Scotland, Edingburgh. Clark, D (1996). Battlefield walks : Scotland. Sutton Publishing, Stroud.
Cyprien, M and Fairbairn, N (1983). A Traveller’s Guide to the Battlefields of Britain. Evans Brothers Ltd, London. Dodds, G.L (1996). Battles in Britain 1066-1746. Arms & Armour, London.
Donaldson, G (1997). Scottish Historical Documents. Neil Wilson Publishing, Castle Douglas.
Dunbar, A. H (1899). Scottish Kings: A Revised Chronology of Scottish History 1005-1625. David Douglas, Edinburgh. Forbes, G. Scottish Battles: 86 A.D. to 1746. Lang Syne, Glasgow.
Green, H (1973). Guide to the Battlefields of Britain and Ireland. Constable, London.
Hamilton, J (2004). Scottish Battles. Geddes & Grosset, New Lanark.
Kinross, J (1979). The Battlefields of Britain. London.
Lancaster, J.H.D (2014). Dunbar: Battlefield visit notes and observations. CastlesFortsBattles.co.uk.
Matthews, R (2003). England versus Scotland, The Great British Battles. Leo Cooper, Barnsley.
Morris, M (2009). A Great and Terrible King: Edward I and forging of Britain. Windmill Books, London.
Ordnance Survey (2015). Dunbar. 1:1250. Southampton.
Ordnance Survey (2015). East Lothian. 1:1250. Southampton.
Sadler, J (2010). Scottish Battles. Birlinn, Edinburgh.
Smurthwaite, D (1993). The Complete Guide to the Battlefields of Britain. Michael Joseph, London.
What Can Still Be Seen?
There is no monument marking the battle but a good view of the terrain can be seen from Spott Loan. The castle, the siege of which prompted the battle, can be seen in central Dunbar but is in a poor state of repair with a portion having been destroyed to create an entrance for the harbour. No access is allowed to the ruins.

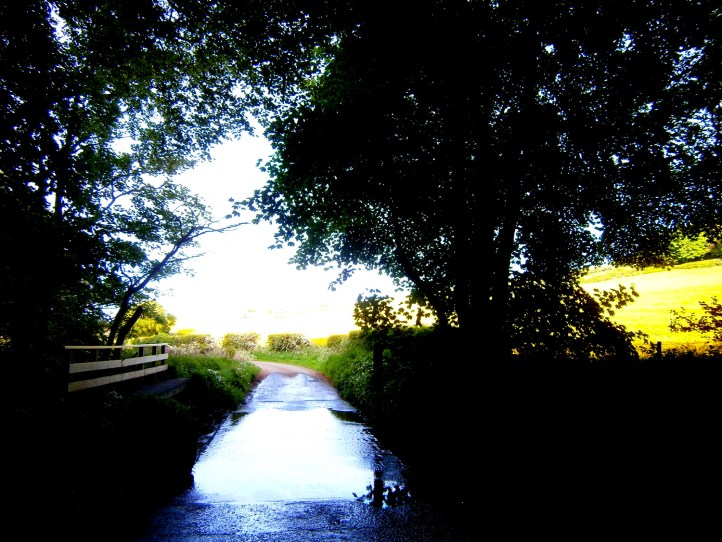
Battlefield. The battlefield can be viewed from near Doon Hill where the Scots initially deployed. The English rode out from Dunbar in the centre of the upper picture.

Dunbar Castle. The castle is extensively ruinous and there is no longer any public access to the castle itself. It can be viewed from the harbour area and promenade
